

[ hair, make-up, nails. oh my! ]
Darling folk,
I’m gonna teach you the ways of my diy gel manicure today. Can I get a woot-woot?! For reals though, this is the best way I’ve found to make my nails last for a real length of time. At work I am require to have “professional looking” nails (i.e. no chips, crazy patterns, etc.) but I can’t afford to go get them done.
I easily get 7-10 days out of my nails this way.
PRODUCTS ::
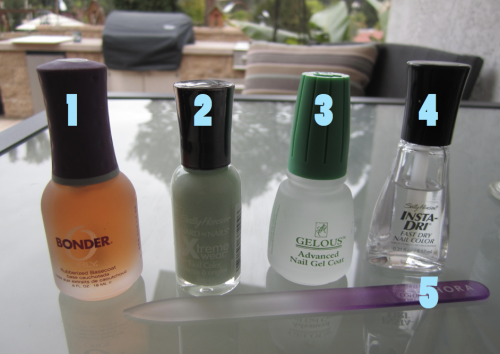
1. ORLY bonder base coat ; 2. any nail polish you fancy
3. American Classic Gelous nail gel ; 4. Sally Hansen Insta-Dry “Clearly Quick”
STEPS ::
1. File and shape nails as desired. Lightly file the surface of the nail.
2. Apply ORLY base coat; let dry.
3. Apply a thin layer of your color; let dry.
4. Apply a thin layer of Gelous; let dry.
*Note: be careful not to paint onto skin with this because it will cause your polish to peel off easier later on*
5. Repeat steps 3 + 4 until you reach the desired color/shade/appearance; Keep in mind less is more!
6. Apply your top coat generously. I usually paint my top coat over the edge of my nail to prevent chipping.
And you’re done!!
So easy right??
Let me know what you guys think or if you have any questions!!
Comment, share, send love!
xo, Alyssa
